
Adding Product Substitution Information in an Application
User Roles
- Read-only
- Administrator
Overview
Norwegian regulations (Aktivitetsforskriften) require that each chemical be evaluated for possible substitution with a less hazardous chemical before being approved for use. The required evaluation is part of the approval process in ChemCenter. The information for this evaluation must be included in the application after the products have been added either from a database or by manually uploading its safety data sheet.
This article covers how to provide substitution information for each chemical.
How to
Each chemical must be A assessed if substitution is possible at each location where it will be used. However, if the Reason for applying for the chemical is to replace another, you’ll need to B verify the substitution instead.

For reference, if the chemical has been assessed for substitution before, its Substitution history may be viewed during assessment.
Assess substitution
Products added to the application are assessed individually.
Assess substitution individually
- Click the Assess button corresponding to the chemical to be assessed.
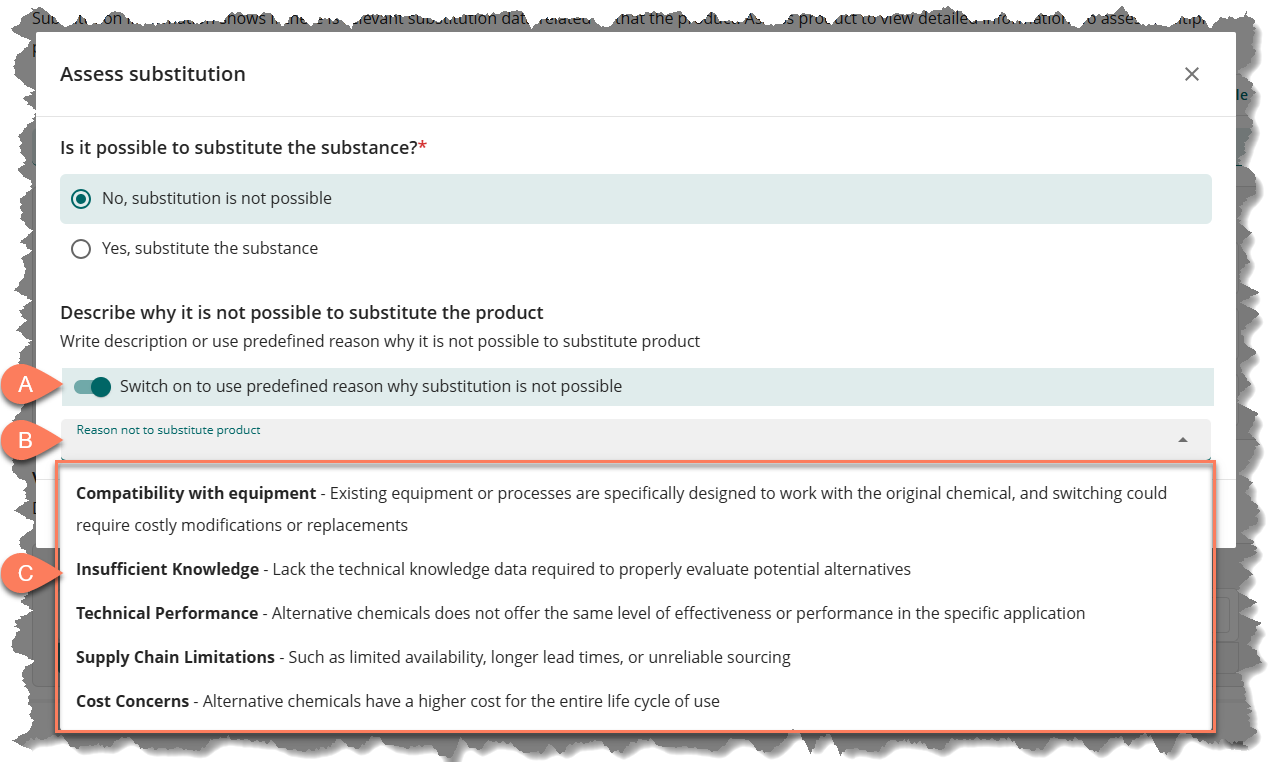
- In the Assess substitution window, select the corresponding radio button if No, substitution is not possible or Yes, substitute the substance.
The next step varies depending on the selected radio button.
If the selected radio button indicates that substitution is not possible, a reason must be provided in one of two ways:
- Enter the reason in the text field.

- Click the toggle switch then select the dropdown field below it to select one of the reasons which are custom-defined by your ChemCenter Admin.
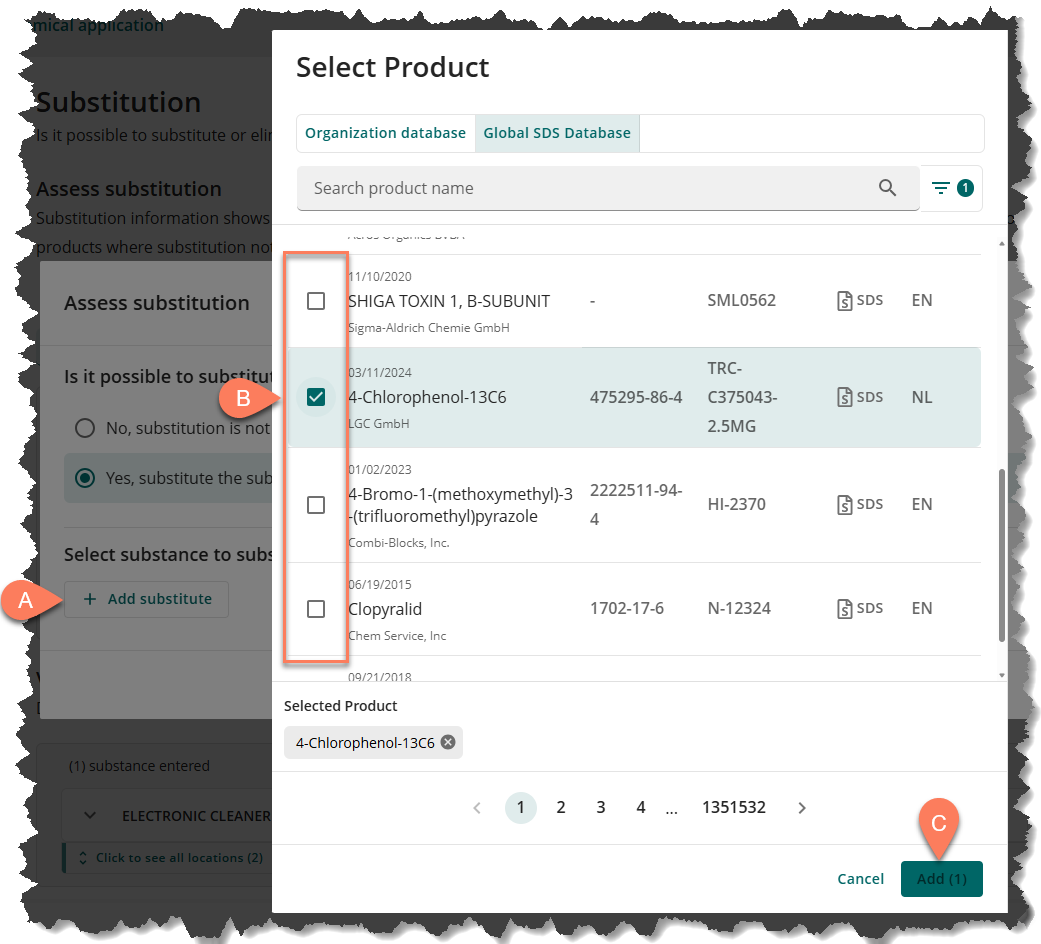
If the selected radio button indicates that substitution is possible, the substitute product must be added.
- Click the A Add substitute button.
- In the Select Product window, select the B checkbox corresponding to the substitute product(s).
- Click the C Add button.
Substitution not possible for multiple products
If substitution is not possible for multiple or all products for the same reason, follow the steps below:
- Select all the chemicals where substitution is not possible.
- Select the checkbox on the header or the Select products checkbox to select all products.
- Click the Substitution not possible button at the top.
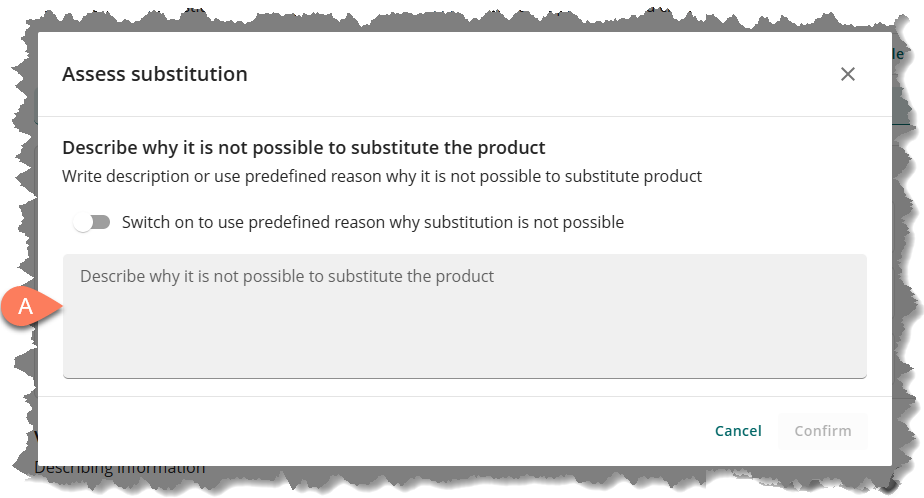
- In the Assess substitution window, enter the reason why susbstitution is not possible in the A textbox.
- Alternatively, click the B toggle button then click the C dropdown field below it to select one of the D predefined reasons.
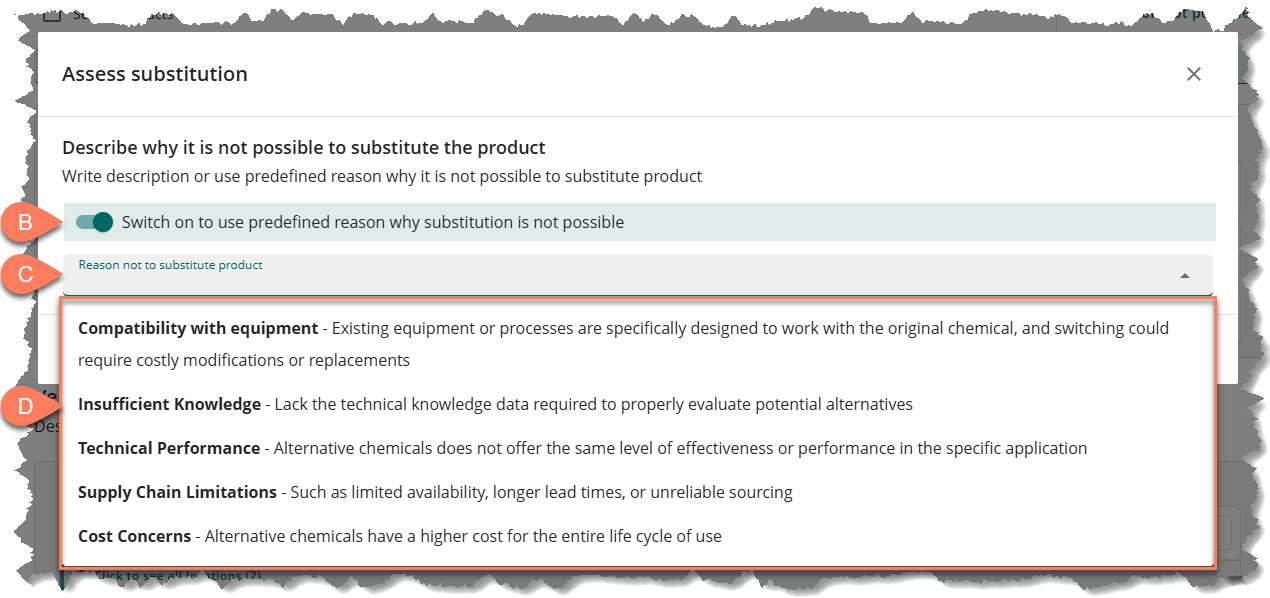
- Click the Confirm button.
Verify substitute
Substitution information must be provided for each location where a product added to the application should replace a previously used chemical. Follow the steps below.
- Show all locations where the application will be used.
- Click the product name or the Click to see all locations button.
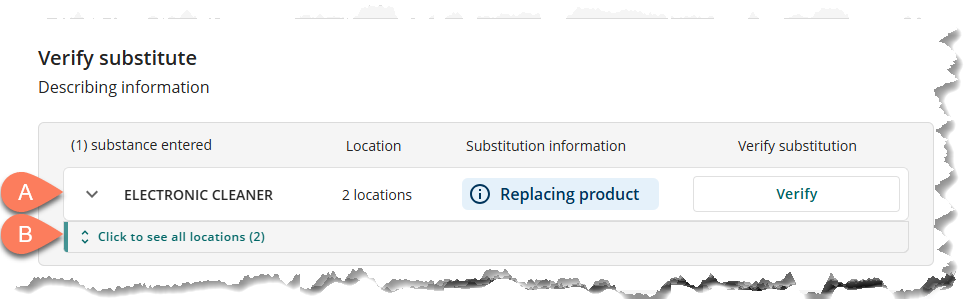
- Click the product name or the Click to see all locations button.
- Click the Verify button corresponding to the location.
- In the Verify substitute window, enter a Reason for substitution.
- To indicate which chemical is being replaced by the product, click the Yes, select outgoing product radio button.
- Click the Add product button.
- In the Select Product window, select the checkbox corresponding to the product(s) to be replaced.
- Click the Add button.
- Click the Confirm button.

If you’re not selecting the outgoing product, click the No radio button then provide a reason why the outgoing product is not selected.

Next steps
After all substitution information has been provided, click the Save and next button at the bottom. The next step is to add information on how the products added to the application will be used.